Final Cut Pro is a helpful video editing software used by professional video editors, filmmakers, and YouTubers. It offers various advanced features, such as multi-track editing, motion graphics, colour correction, and advanced audio editing tools.
The software is user-friendly and efficient, making it ideal for those who need to edit large amounts of footage quickly and efficiently. Final Cut Pro integrates well with other professional video and audio software, such as Pro Tools and Logic Pro, making it an excellent choice for those working in film and television production. In a word, it is best suited for professional and experienced video editors, but some YouTubers and hobbyists also use it.
- Open Final Cut Pro and import the horizontal video you want to edit.
- Drag the video to the timeline and select the video clip.
- Go to the “inspector” window, and under the “video” tab, select “transform.”

- In the “transform” tab, you will find an option to “flip horizontal” or “flip vertical” use the vertical flip option to rotate your video.
- Adjust the video to fit the frame using the “crop” function in the “transform” tab.
- Adjust the audio and add any other desired effects or transitions.
- You can add some text or titles to your video if you want.
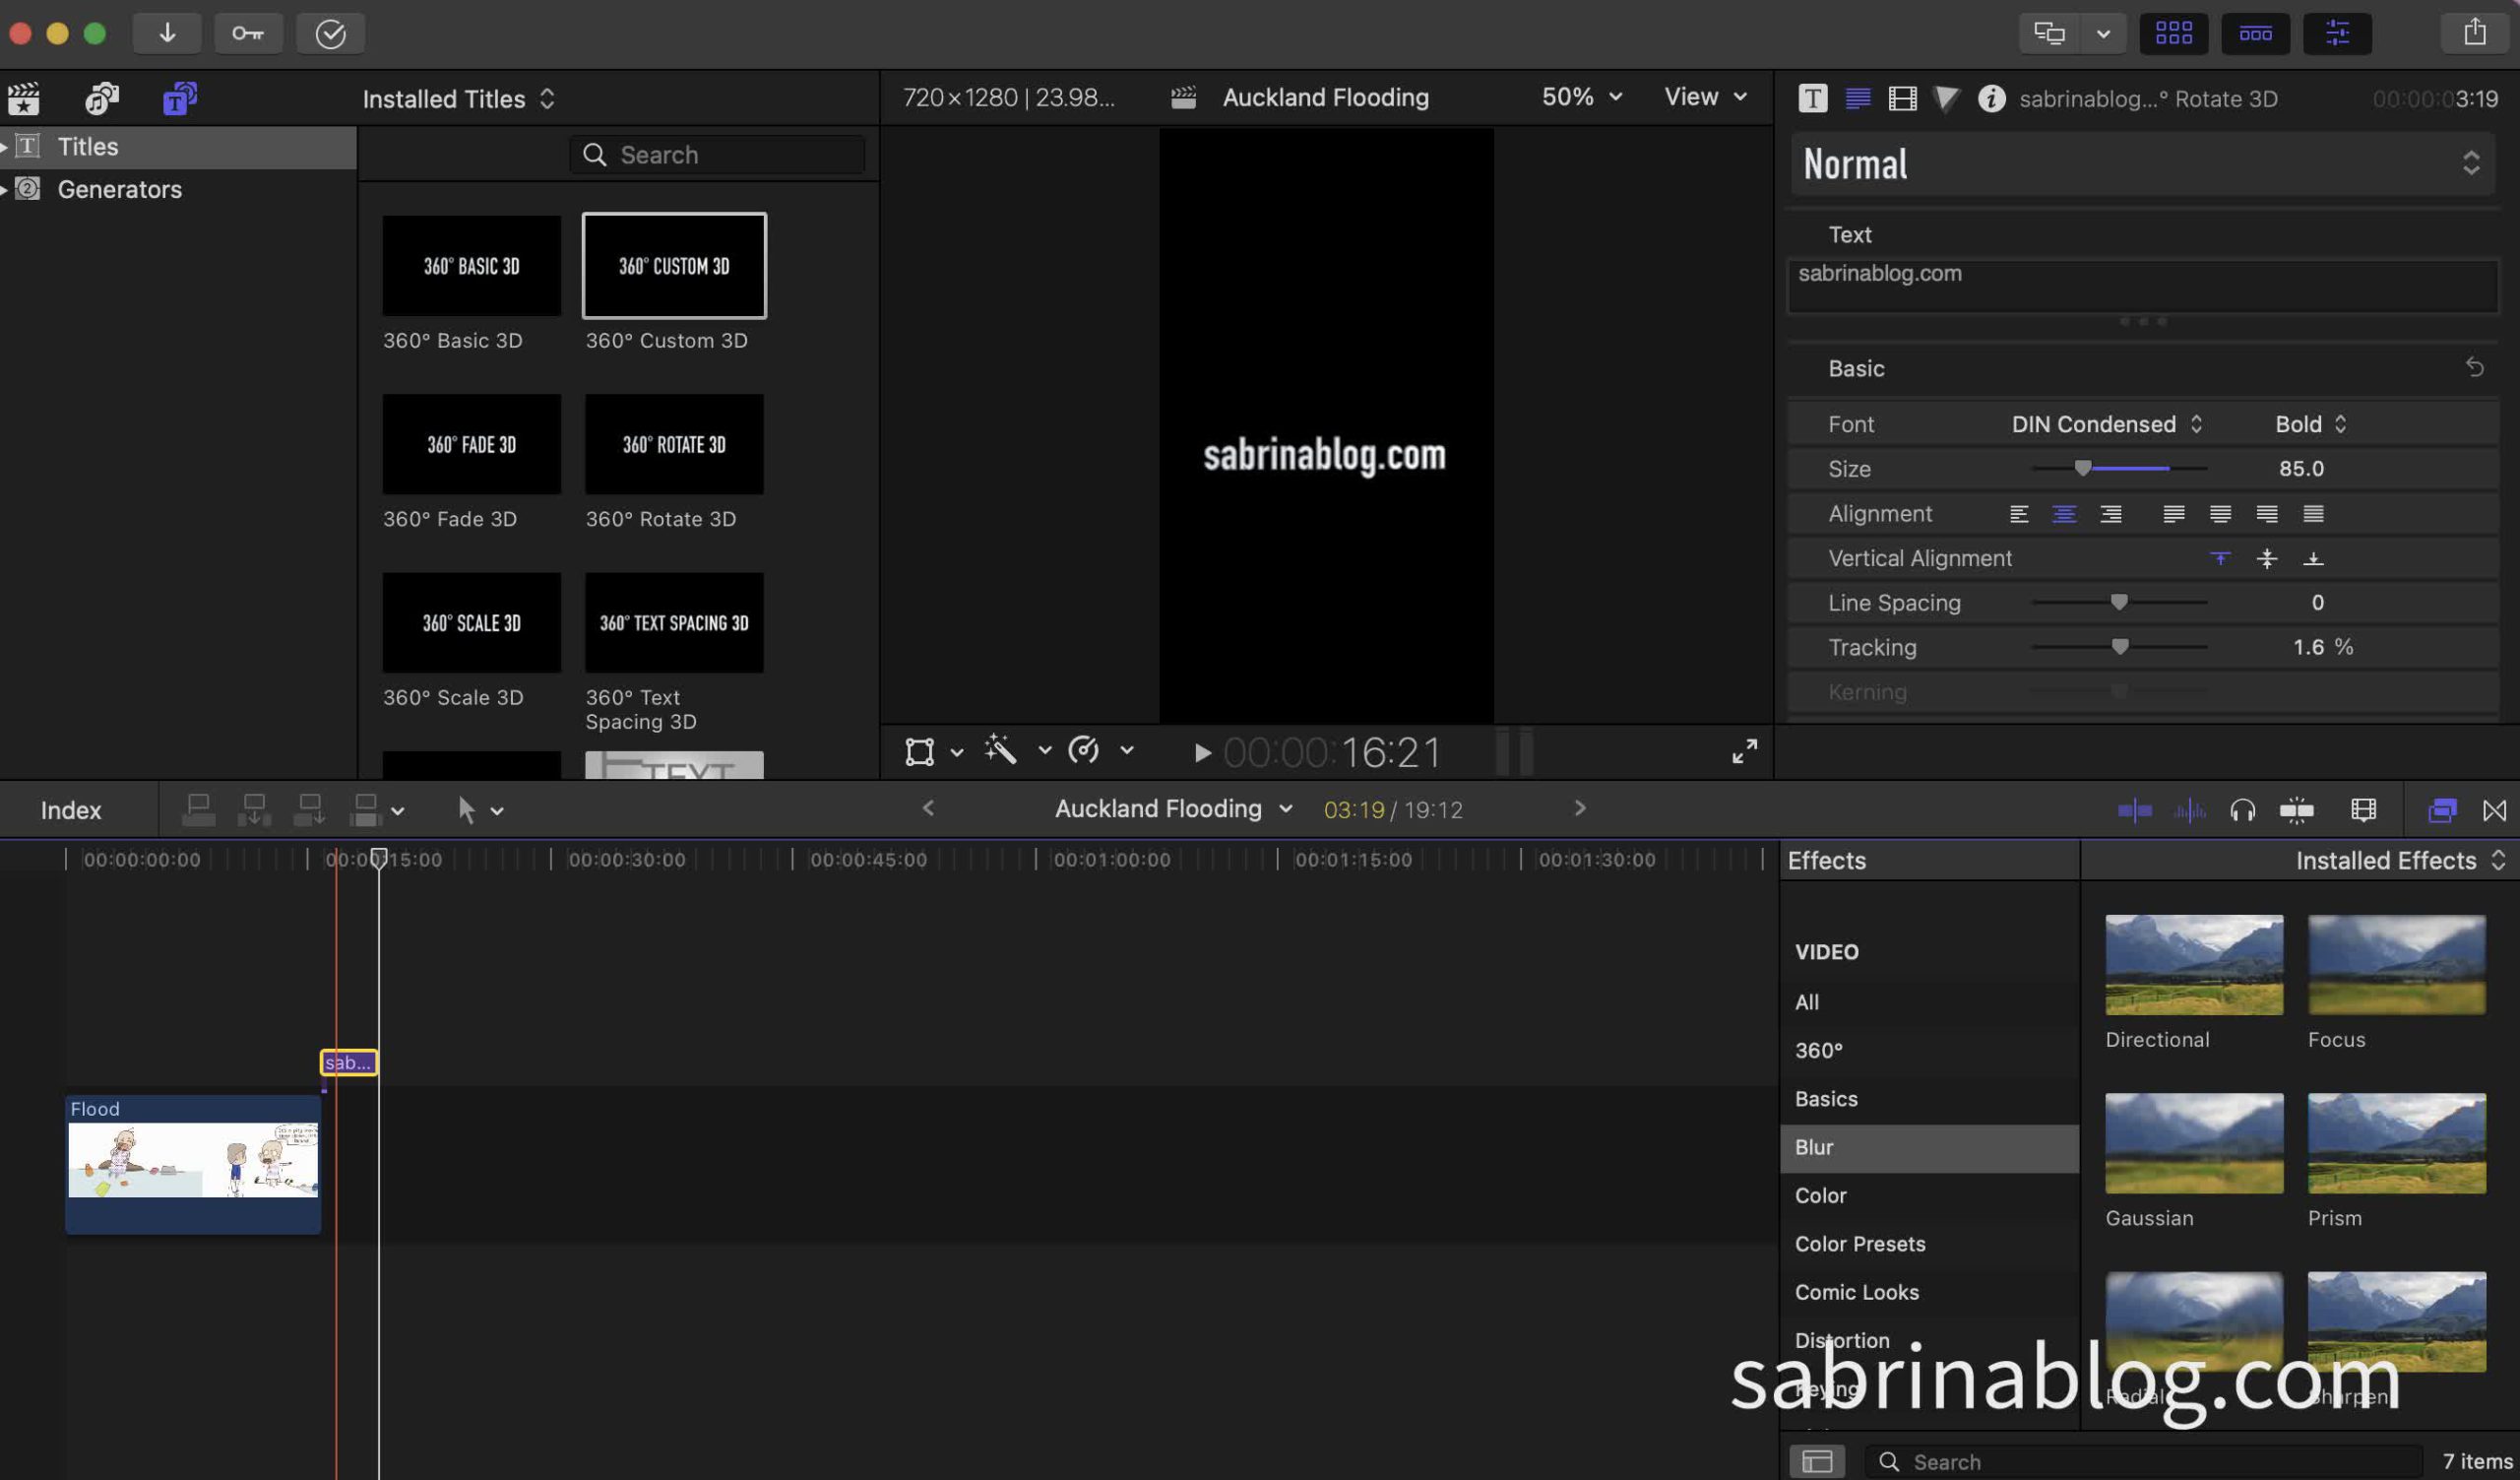
- Export the final video as a vertical video.
Or if you don’t want to crop any of your videos, from the above second step, you should do these:
- Create a new project.
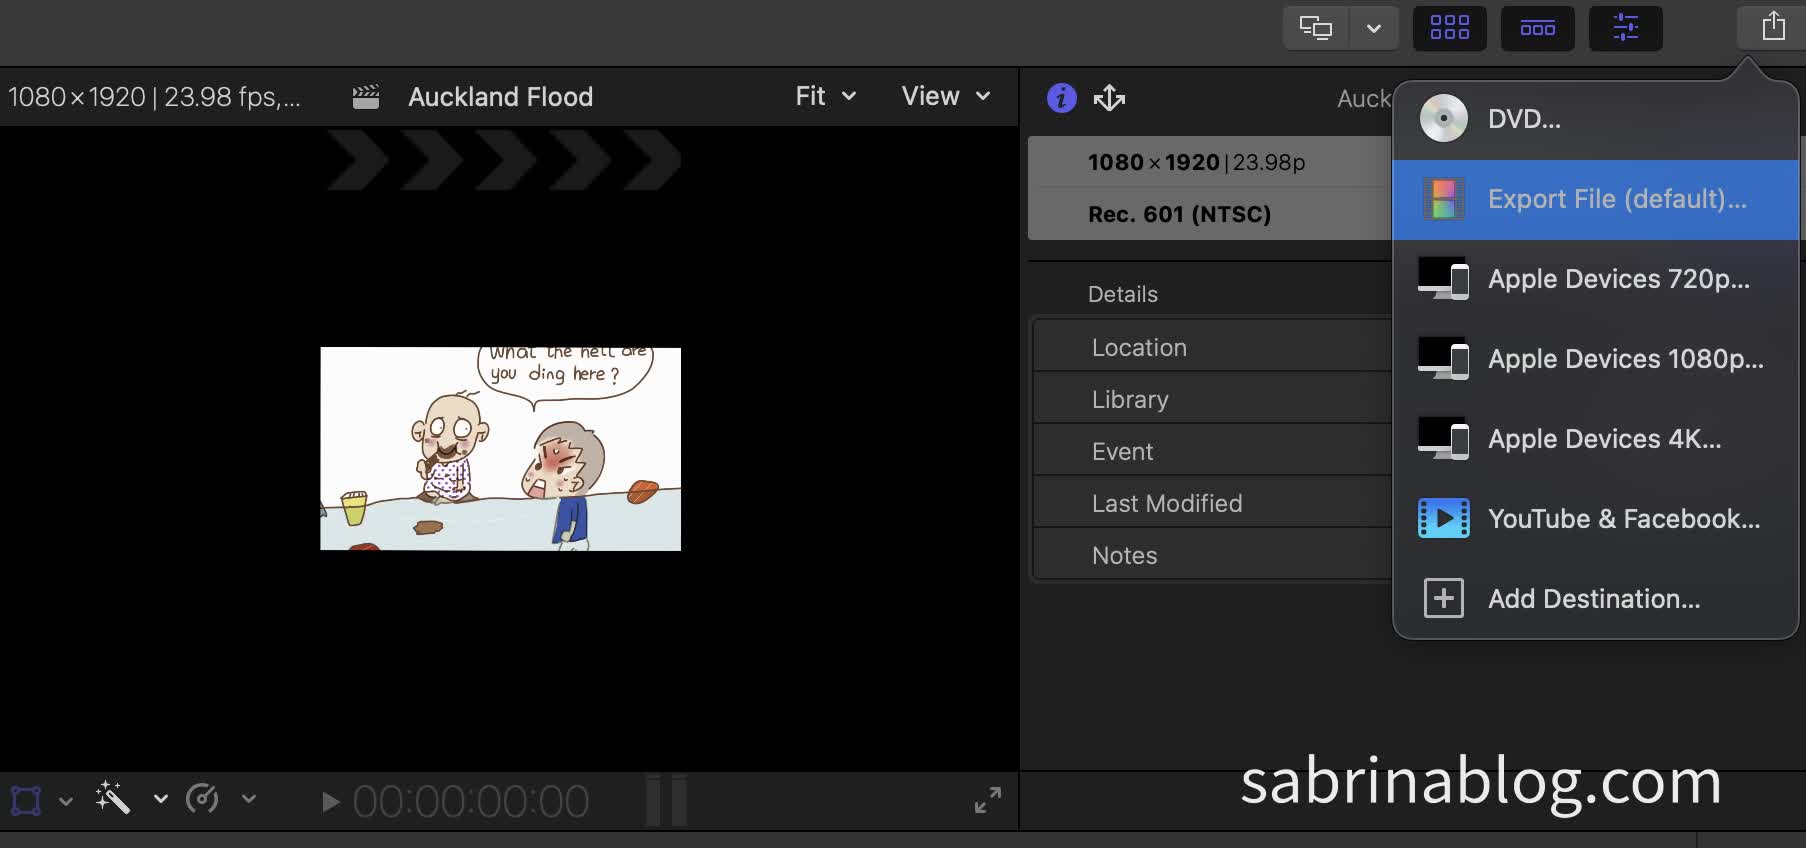
- Click the drop-down menu, and set the video to ‘Vertical’.
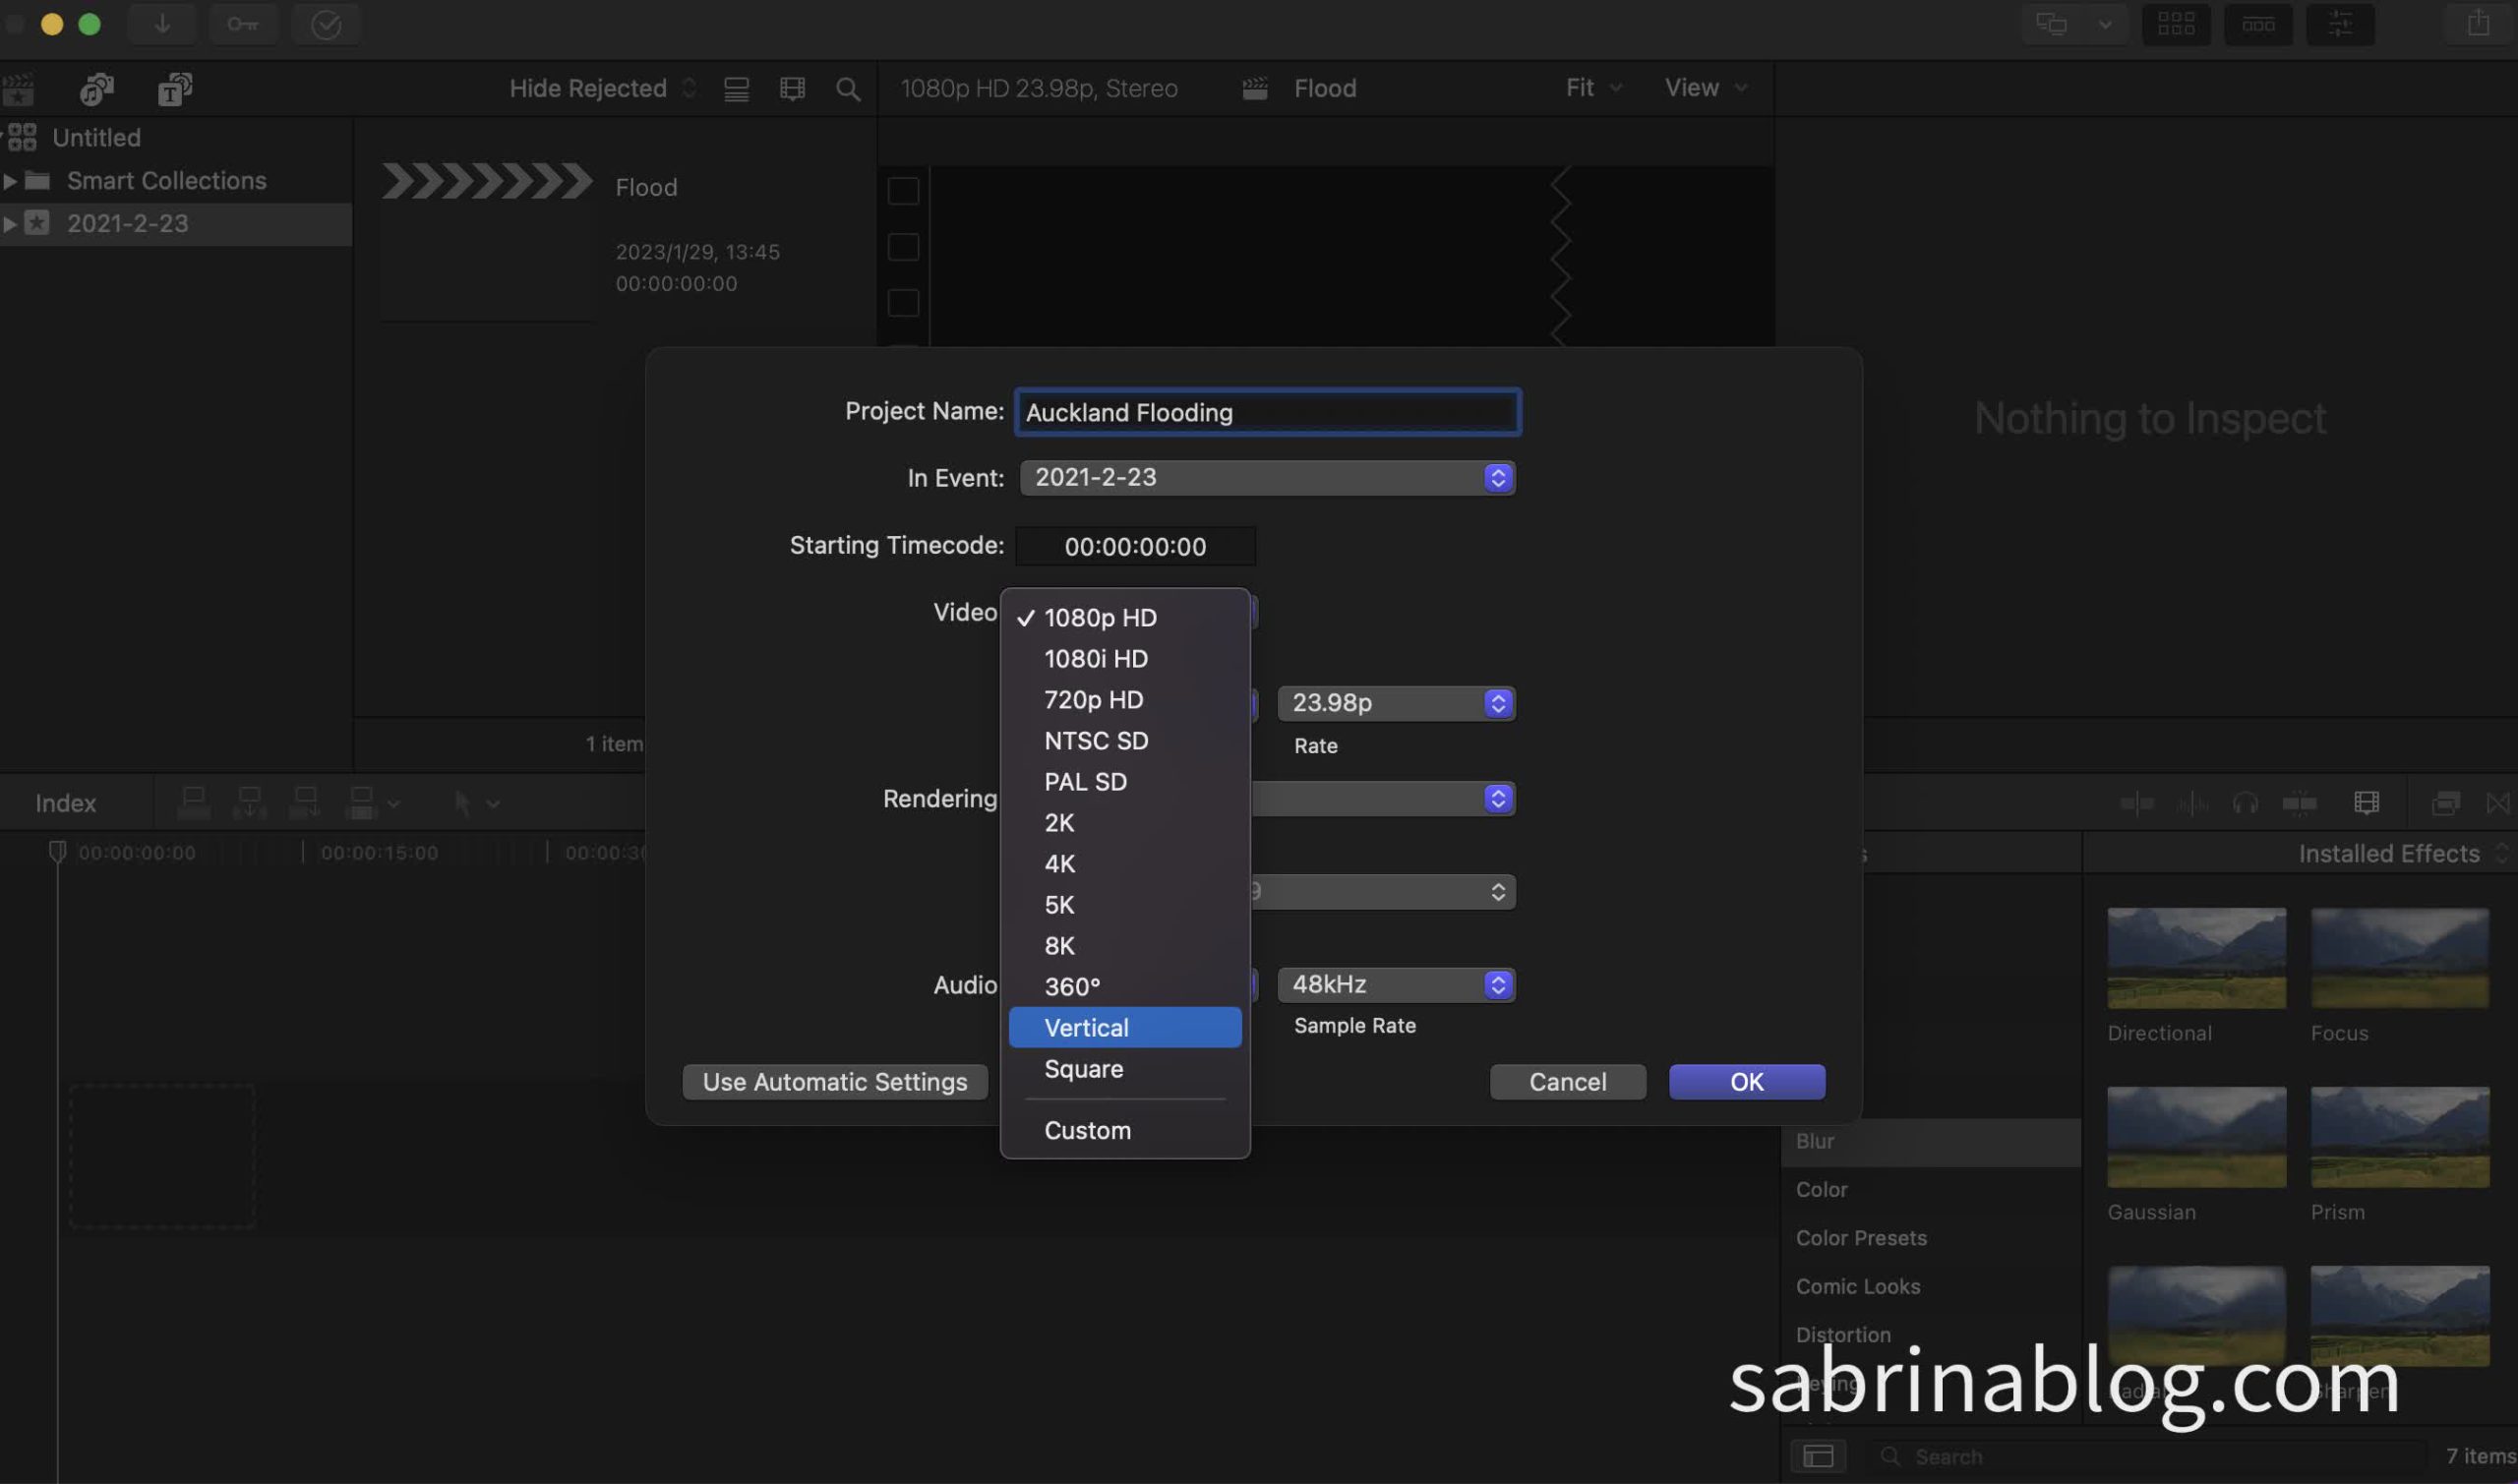
- Set your resolution. Typically, Instagram and ticktock usually use 1080*1920.
- Set the Color Space to Rec.709.
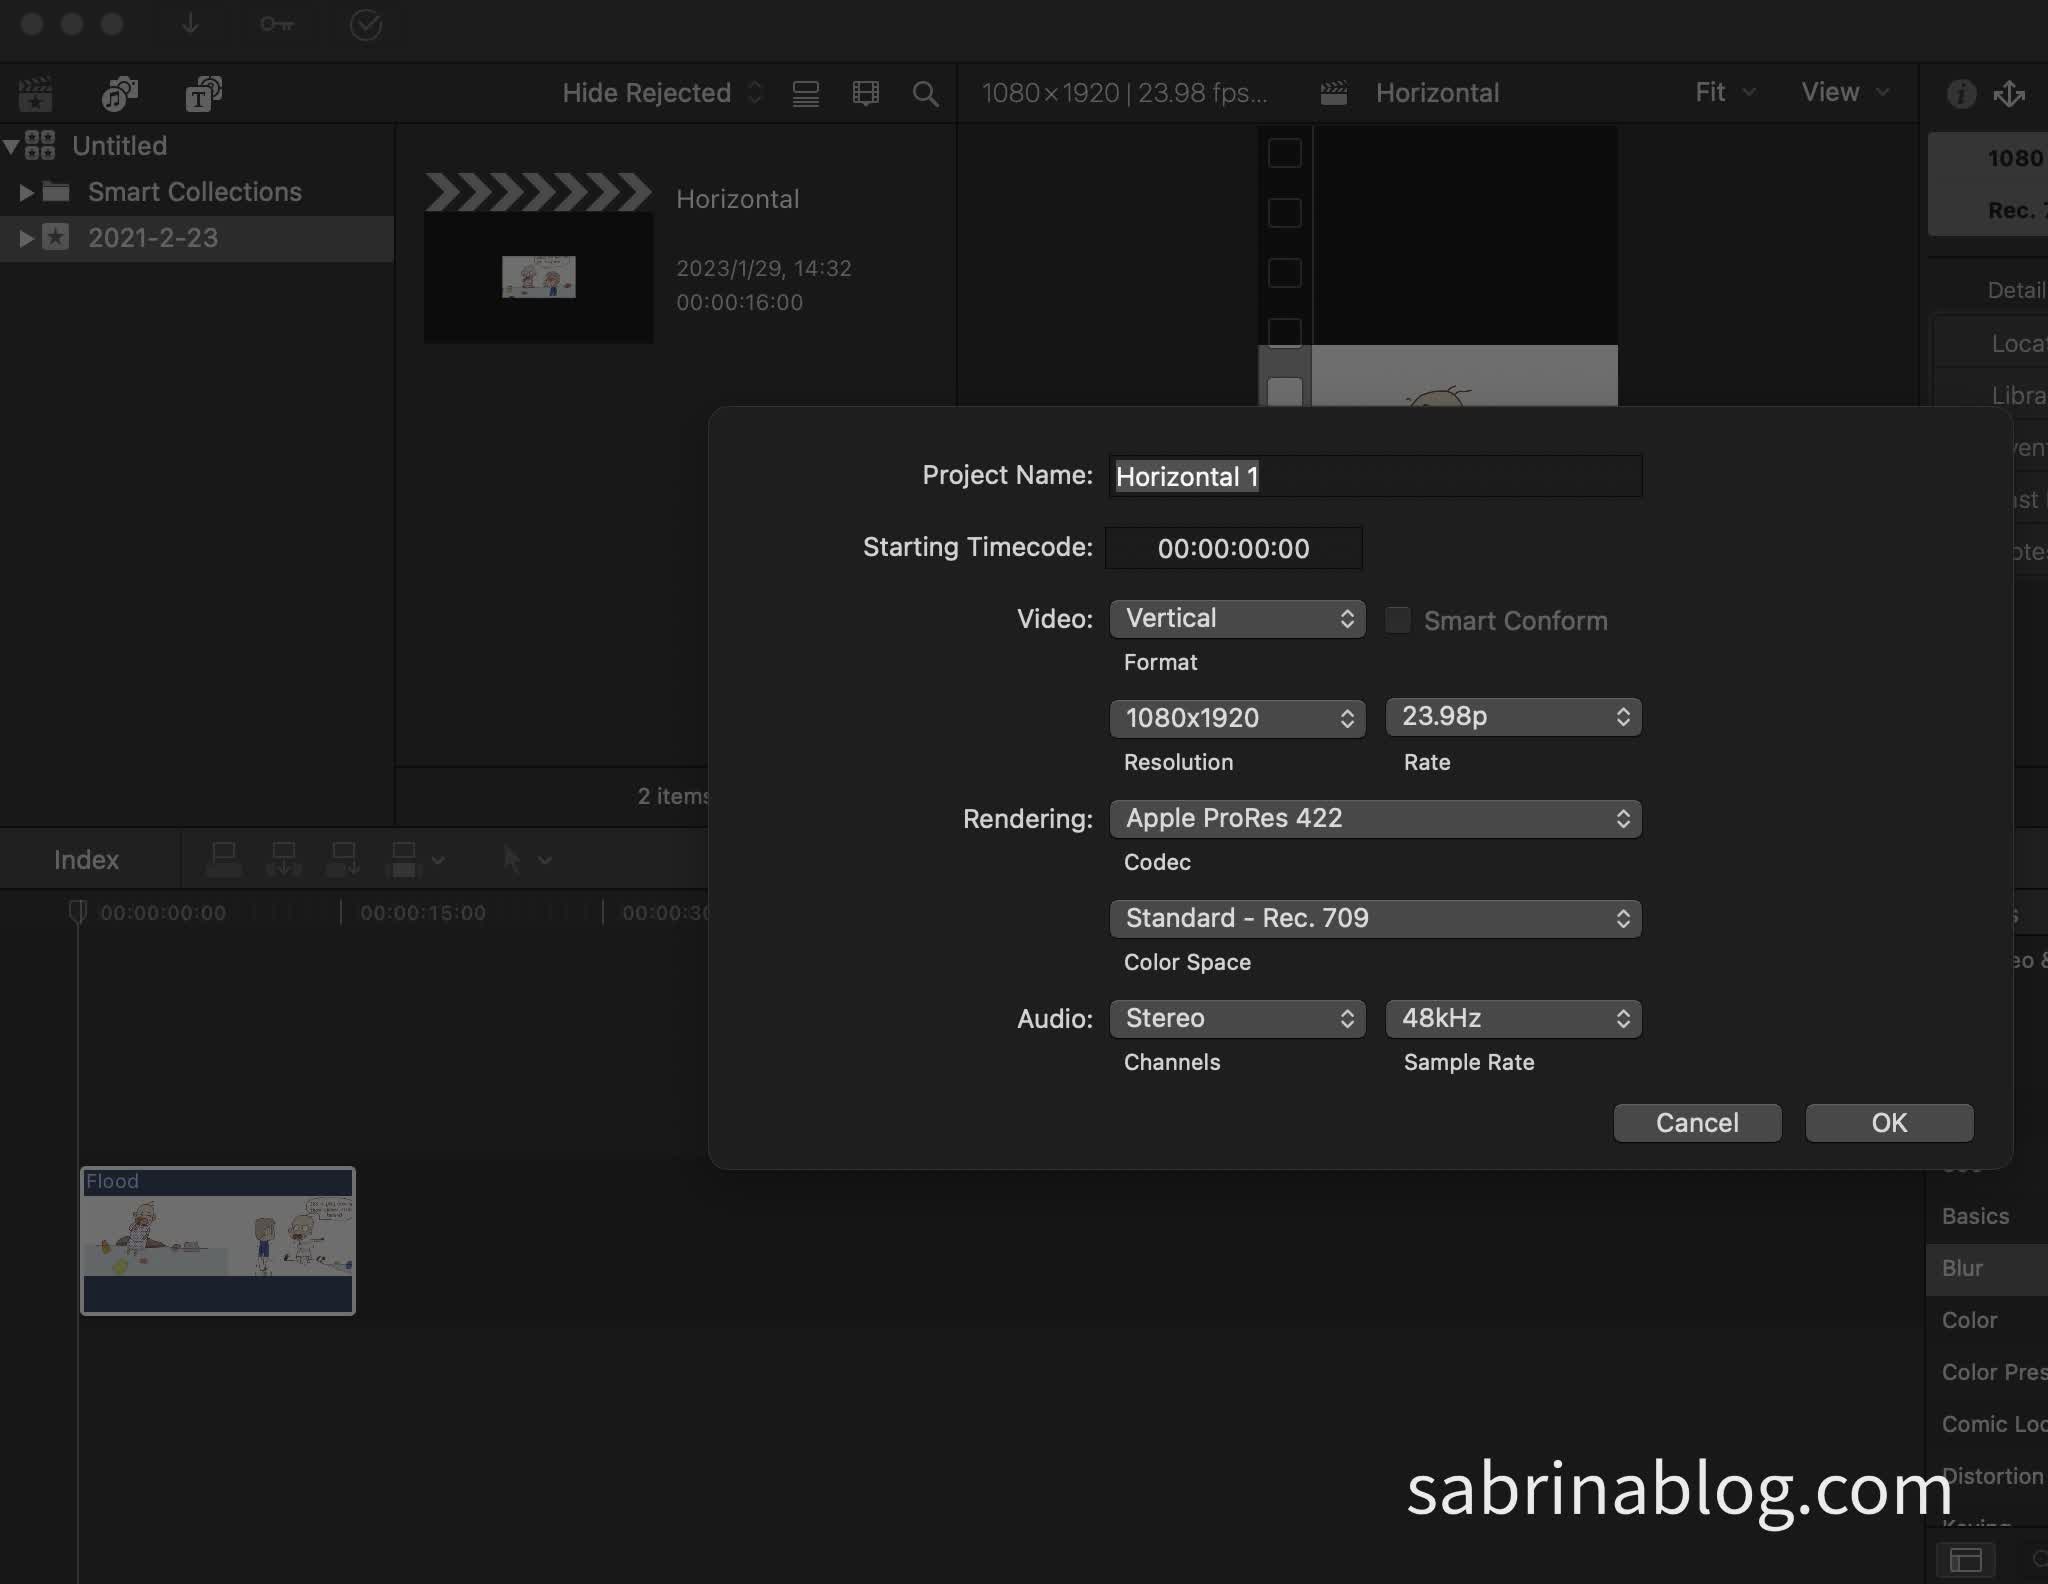
- Tap OK.
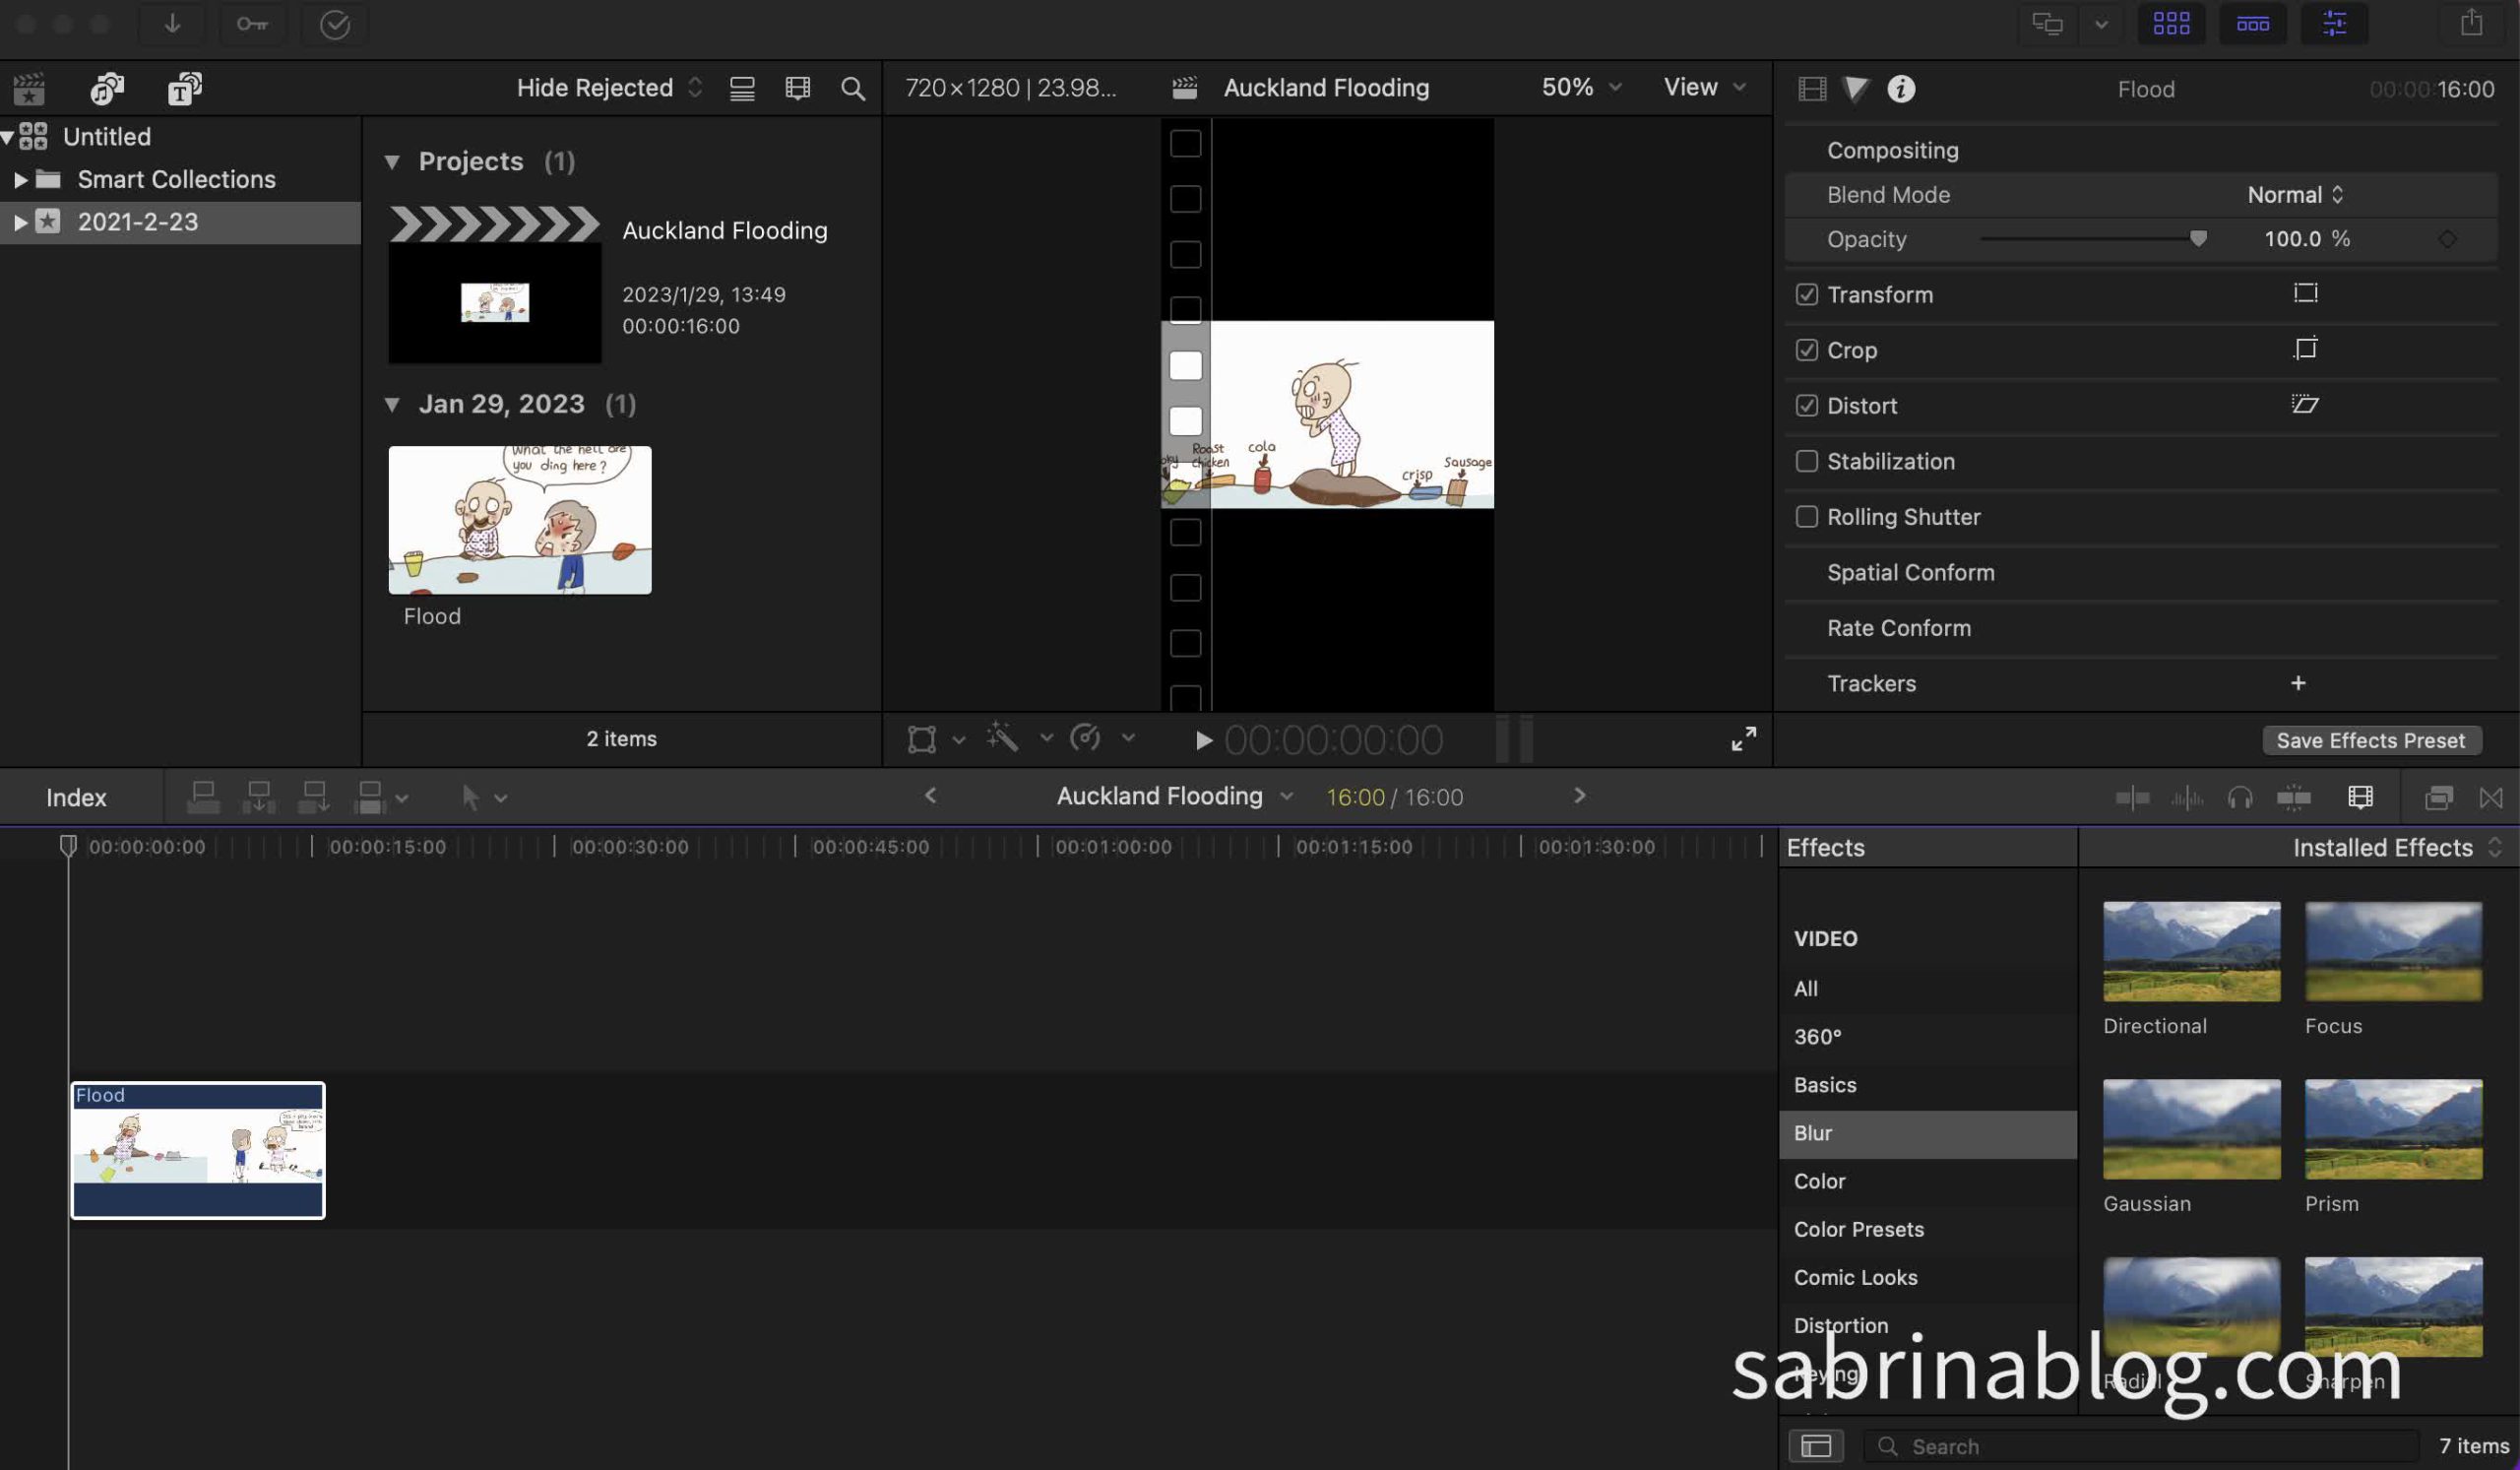
- Save the default file or choose the suitable one for YouTube & Facebook.
Those are only simple instructions. I will later tell you how to use Final Cut Pro to make an advanced video.



Leave a Reply
You must be logged in to post a comment.